Making tiles with “Tile Studio”
Jacques Paris
May 2001
Creating
a new tile
An existing bitmap may serve as a basis for a new one. Changing few
pixels may sometimes give a different impact to the new pattern or add a
variation in a set of patterns.
One must make sure that the background color is properly set to WHITE.
This is required for a monochrome image; it will be the color that MI will
treat as “background”, in fact transparent.
menu View | Background Color
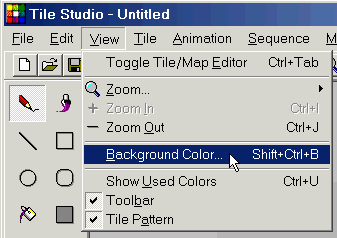
Clicking on “Background Color” opens a standard color requester.
Choose WHITE. That operation has to be done once after T.S. is open.
menu Tile | Add New Tile
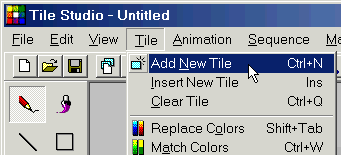
The first time one adds a
tile, it will open with default values. These must be set properly with
menu
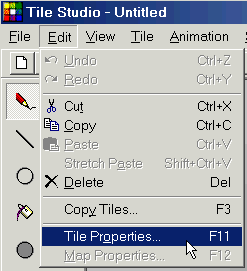
Edit | Tile Properties
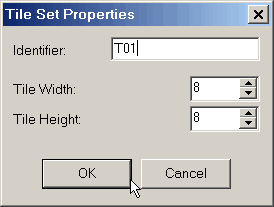
Choose the identifier of your liking, it will be used for the T.S.
session only.
Make sure that the width and height are set at 8.
Any new tile will have those properties.
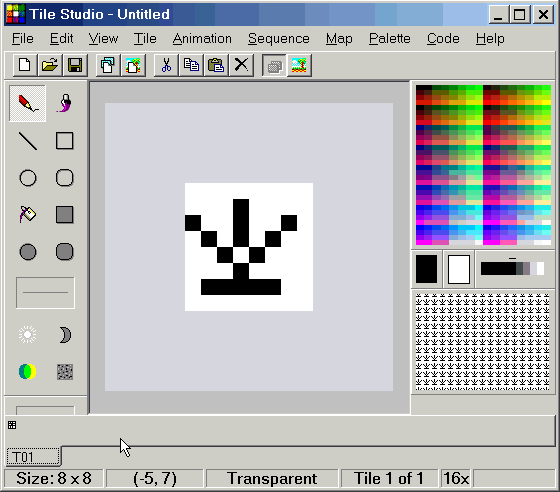
The T.S. window has been reduced to its minimum since without squishing
the work area. The zoomed in view and workspace of the bitmap is the central
square area. The pattern viewing window at the right bottom corner of the T.S.
window has not been reduced in size.
The displayed pattern shows that if one wants a symmetrical pattern based
on a central one-pixel line, that pattern cannot “cover” the entire 8x8
square. It will measure at the most 7 pixels in the other direction than the
symmetry axis (7 wide for symmetry relative to the vertical axis).
For most applications, one needs only to use the pencil tool and the two
largest boxes black and white to switch between colors.
n.b.
Several bitmaps can be loaded at the same time. Switching between them is
simply done by clicking on the desired identifier tag, but if several
images are defined with the same identifier (adding new tiles without changing
the identifier in the Tile Properties requester), choose the image among those
displayed in the bar below the workspace (in the image above, there is only
one above the T01 tag)
Importing
a bmp fill
Starting with an existing bitmap requires importing that file.
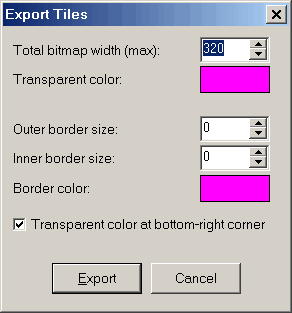
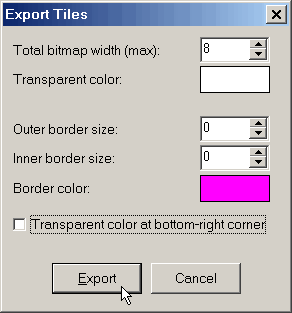
menu File | Import Tiles
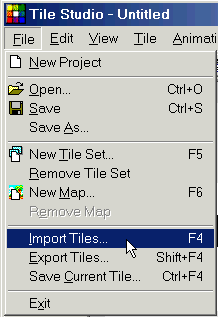
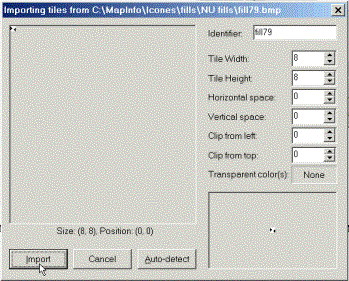
Clicking on “Import Tiles” opens the requester to the left above
(reduced size image, a full size section below)
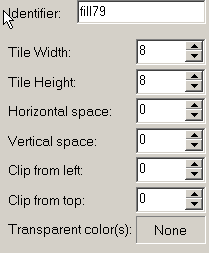
The identifier is automatically assigned the name of the bmp file. The
user must enter the right width and height values (8), all others being 0, and
make sure that transparent color is “None” (a right click on the mouse in
that box will do)
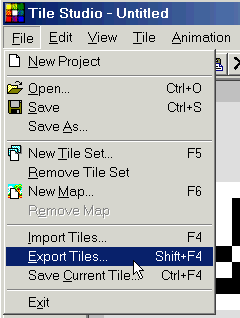
Saving
a bmp fill
We are interested in BMP files and not files in Tile Studio format. The
Save or Save AS command will not do the trick.
menu File | Export Tiles